That said, keep in mind the "galloping horse" rule. We learned the rule in our household back in our quilting days. It goes like this: If you don't notice the mistakes when riding by on a galloping horse, then it's good.
Now, on to the tutorial.
 If you want to do a grid of dots, why not incorporate a few round things? Pumpkins come to mind for a Halloween card. But we have a hard enough time sending out Christmas cards, so I will use Christmas ornaments. Here's how I did it:
1. Create a new document that is 5x5 inches at 320 dpi (this is because 5x5 is a good card size).
2. Get into those grid preferences and adjust the settings for nine equal squares (just like we did in the previous "dots" tutorial).
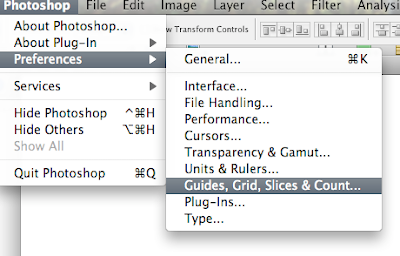 I set the main divisions at 1.66666, but I put the subdivisions at on 16 (as opposed to the 32 on the previous tutorial—galloping horse rules, right?).
 3. So now that you have a nice little blank document with a grid (if you don't see the grid, turn it on in the menu: View--> Grid), you need two things: those ornaments, and some round pictures. First, the ornaments...I really didn't feel like having an ornament photo session, so I bought a photo from iStock Photo (this one). Stock photography is a great way to get good quality images quickly. For certain purposes, the price of a stock photo is worth the time it would take to do your own. Just make sure to buy an image size big enough for your needs. As for your own family photos, well, unless you want to construct the perfect artificial family (which, for the right person, might be very entertaining), you had better take your own portraits.
4. Now you need to separate those ornaments and drag the ones you want onto your card-in-progress. The advantage of stock photography is that you can get clean photos on white (read: extraction-friendly) backgrounds. Every Photoshop user has their favorite method of extracting an image. In this case, here's what I did:
Maybe it's because Halloween is near, but I chose the "Magic Wand" tool (W). When it is selected, you can put a number between "0" and "255" in the "tolerance" box. Because I am a reasonably tolerant person, I set it to "40" for starters. But, no! That just wasn't tolerant enough. When I was hoping for a completely outlined ornament, I got something like this:
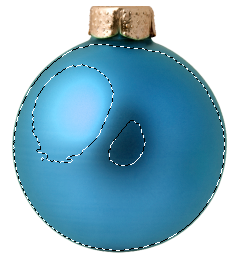
It turns out, if I had put "200" in the tolerance box as seen below...
 ...I would have been able to select it in one click. So the lesson here is to play around with tolerance numbers. Oh, and just so you know, what those numbers really mean is how closely the magic wand will match colors (i.e. larger number=wider selection).
One more thing before we move on: if you make a selection that isn't wide enough (such as in the image above), you can keep adding to it until you get what you want. Just click the "add to selection" box in the magic wand menu bar (it's the second from the left) and click in areas that aren't selected until you finally get something like this:
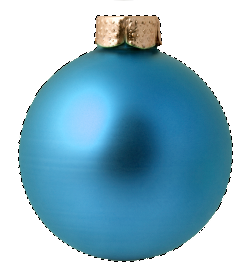 5. Now it's time to get that selection on its own layer and drag it onto your card. Hit Command-J (PC: Ctrl-J) and you have a new layer with nothing on it but that one ornament. Now you can use the move tool (V) to drag it onto your card.
6. Congratulations! Your card is looking much more festive already. But are you happy with the size of the ornament? If not, hit Command-T (Ctrl-T) to bring up a transform box around it (see below).
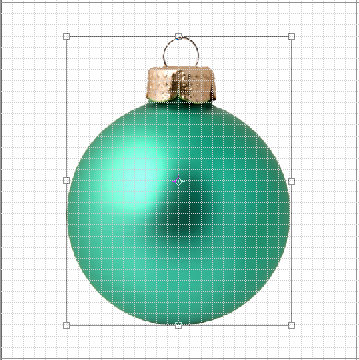 Just grab one of those corner handles (while holding shift to keep the aspect ratio) and drag out or in to change the size. Hit "Return" to apply the transformation. You will be using this step many times before the card is done.
7. So let's say you have got one ornament to just the right size. What about the others? First, you need to extract them one by one (as seen in step 4), drag them onto the card and into the same approximate space as the already-transformed ornament (step 5), and then—because we are not going to be too picky—put the new ornament layer below the perfectly sized one and use it as a guide:
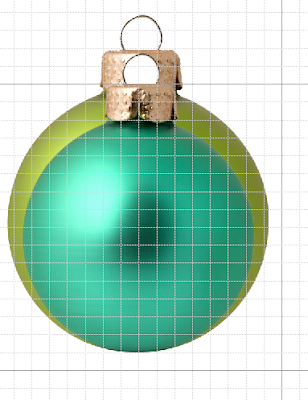 Make sure the appropriate layer is selected, and then bring up that transform box. If you line up the bottom and then drag the top corners down (a little from one side and then a little from the other), you should be able to get pretty close. You can move it around at any time by clicking in the box (not the handles) and dragging. Once you think you've got it right, apply the transformation. Then, to double check, change the layer order so the model ornament is on top. If it still looks good you've done it. If not, just transform it some more until you've got it.
8. Repeat the above process until you have all the ornaments you want.


9. Time for the photos. Open a photo. Select the elliptical marquee tool (seen for Elements at right, and CS3 at left). Now click and drag in your photo while holding the Shift key (this keeps it circular) until you have the area you would like to crop. Hit Command-J (Ctrl-J) to copy your selection onto its own layer. You can now move it (V) onto your card and transform it as desired. I used the ornament for a general guide on the first one:
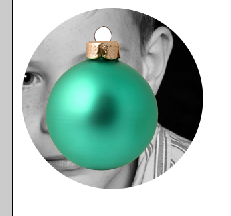 But after that, I used the first photo as a guide for the others as described in step 7. If you look at my card, you will notice that I decided to make the photos larger than the ornaments (not that you have to do the same).
10. One more thing you may notice is that I removed those little loops from the top of the ornaments. They were getting in the way. I simply selected the rectangular marquee tool (right up there sharing menu space with the elliptical one), selected the offensive loop, and then cut it out (Mac: Command-X, PC: Ctrl-X or choose Edit-->Cut).
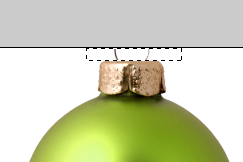 Make sure you are on the correct layer when you do this or you will cut a hole in another image.
11. Finally, you are free to arrange the photos and ornaments as you like. Use the subdivisions in the grid to help you keep things in line. When you are happy (or at least "galloping horse" happy), you can flatten your card, print it, and glue it on to card stock and impress all your friends.

No comments:
Post a Comment