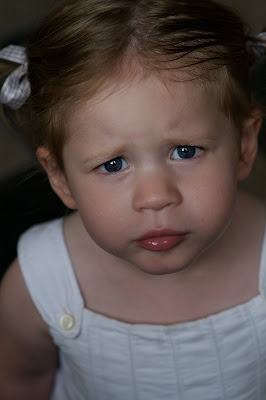
 The problem:
I love this photo of Eva that I took in Paris last year, but it's a little dark and it will look even darker as a print (without the benefit of computer monitor backlighting). And to top things off, the lighting in my home is not very bright, so a dark photo in a dark room will not stand out.
The TOP "starters" solution:
A quick disclaimer that I will try not to repeat every time I give Photoshop tips: Any given photo problem may have a dozen or more possible solutions. It's good to learn several methods, but since this is a "starter," I will stick to quick and easy ones. The following solution can be summed up in one sentence (Make a duplicate layer and choose "screen" to blend it.), but I don't want to assume prior knowledge, so I'll walk you through every step.
This works in both Photoshop and Photoshop Elements, but since I want you to learn keystrokes there is one step that Elements users will need to do that is not necessary in Photoshop.
Elements users (If you have Photoshop, skip to step 1):
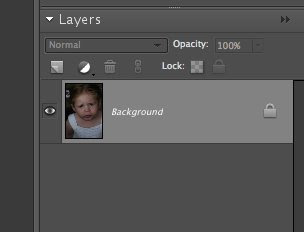 See how the photo you have opened says "Background" under the Layers Palette? Well, double click on it, then you'll see this:
 Just click OK and it will now be called "layer 0" instead (Or, I just ran into a comment on a blog that says you can hold "alt" and double click on the background layer. This won't change the name of the background, but it will do the trick even faster). Now you're set for the actual instructions...
Step 1.
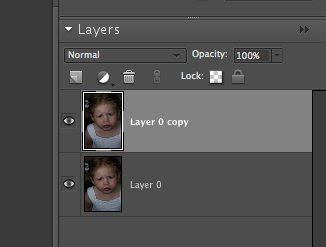
Press "command J" to duplicate the background layer. It will look like this for PS Elements 6:
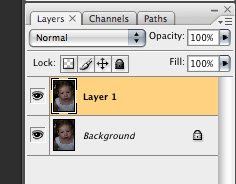
 And like this for Photoshop:
 Step 2.
Make sure your top layer is active (see the images above). Now click on the arrow next to the word "Layers" and you will see a pull-down menu of blending options. We'll explore more of these in a future post. For now, choose "Screen"
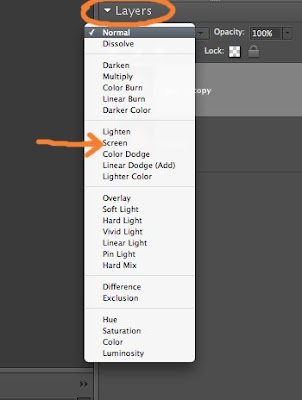 And watch what happens:
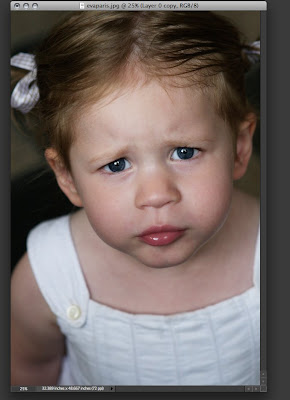 Your photo is about twice as bright.
Step 3.
Too bright? No problem. You can dial in the exact amount you prefer by adjusting the opacity. In the image below I decided to dial it down to 70%:
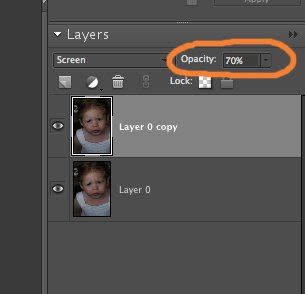 Step 4.
You want to end up with a regular .jpg file that you can print, so there's one more thing to do. Make sure you "flatten the image" before you save. There's another handy pull-down menu in the layers palette where you can select "Flatten Image" (see the image below):
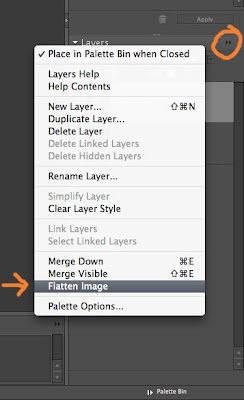 Now you can save a print a much improved photo.
Here's a photo showing BEFORE and AFTER (with my final choice of a screen at 70% opacity):
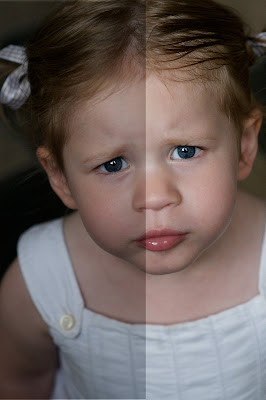 Doesn't it look like a layer of grime has been removed? So much better and so easy to do.
Postscript tips
- If you need to brighten even more than 100%, copy yet another layer (command J), blend with "screen" and dial the opacity as needed.
- You can follow these same instructions and choose "Multiply" to make photos darker. Be warned, however, that blown-out highlights (parts that are pure white) won't get darker (a good reason that an underexposed shot is generally better than an overexposed one).


2 comments:
Wow! Thanks for the tip.
thanks for sharing this article. your articles have help me to get hands skilled on photgraphy
entry level international jobs
international job recruitment agency
international jobs in europe
help looking for a job
most popular job site
find your next job
google for jobs
people looking for jobs
international jobs online
jobs near me
jobs in Austria
jobs in belgium
jobs in india
jobs in pakistan
jobs in Qatar
jobs in UAE
Post a Comment