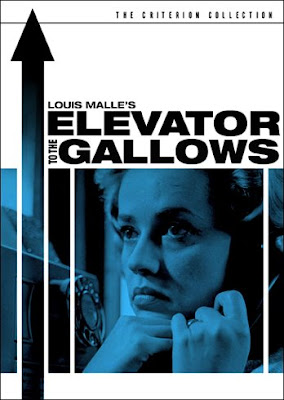
Beginning in October and all the way through December I will do a series on holiday gift ideas and DIY card inspiration—all using photos, of course. I recently did a post about getting inspiration from good design (in this case, Criterion DVDs). It can be a lot easier to adapt a pre-existing good design than to invent something from the ground up. And you would be surprised how easy it is to do. I won't do a whole tutorial in this post, but you will have plenty in the coming months. For now, I just want to show you how fun it can be to go from foreboding drama...
 to happy holiday card...
 using the things you've learned on this blog.
The shorthand version of how I did it:
1. I brought up the inspiration photo and turned on the grid to approximate the layout.
2. I opened a new document (with "show grid" enabled) and used the rectangle shape tool to draw the shapes. For the tree on top, I used a dingbat from a free Christmas collection (it was the letter "d").
3. I toned the image of the girl (a stock photo for demonstration purposes) and then copied it into the other document.
4. I created a clipping mask using the shapes in exactly the same way as with fonts.
5. I used a red-to-green gradient, a duplicate clipping mask, and a layer mask to fill with color up to the tree.
6. I added text (using two different fonts to make the spacing match up better).
That shorthand explanation won't be much help (esp. step 5) if you're new to Photoshop, but in future months you will be getting some easy-to-learn ideas for cards and more.


1 comments:
Precise and easy explanation!
Post a Comment