L'ange de...what? Titles sound more pretentious in French, don't they?
Time is almost up for the Brushes Monthly Special. Record low participation. Record high readership. I'm stumped.
In any case, I wanted to do one last brushes experiment with the set I made before moving on to a new theme for January. The photo was taken in Paris. How often do you just happen upon an angel walking down the street and into the woods? It was kind of like a scene from Wim Wenders' Wings of Desire (with a bit of Russ Meyer thrown in).
I'm not sure that I like the with-brushes version better than the toned and shaded base photo, but I do love playing with the depth and ambiguity that brushes can add.
Showing posts with label Experiment. Show all posts
Showing posts with label Experiment. Show all posts
Tuesday, December 30, 2008
Friday, December 12, 2008
Another PS Brush Style, Another Tip

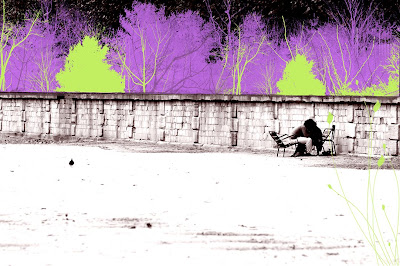
This is a completely different look than yesterday's post. I'm still not sure what I think about it—except that it makes me think of the cheesy Tiffany rendition of "I think we're alone now." Probably a bad sign.
In any case, I wanted to try something that had less dimensionality and that was blatantly artificial. The whole thing was done with Fresh Foliage brushes. The bright brushed-on trees shield our young lovers from the passers-by above (hence, the song reference).
My tip—or observation:
There is something about brushes that seems to call out for monochromatic or toned photos. I did a hi-contrast grape tone on this photo because I didn't want too much realism with the brushes. In my last post, I didn't do any toning, but the photo was already very monochromatic. And my first brush experiment was also toned. But this is no rule (there are none), just an observation.
What do you think? Too strange? Just your style?
Post some of your own experiments and link back to the Monthly Special.
Thursday, December 11, 2008
Tips from Experimenting with PS Brushes
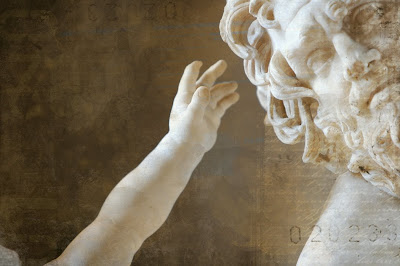
 Here is a brush experiment with a photo I took in the Louvre. Some of the brushes I used are:
- The shoreways acrylic set
- Some of recife's great brushes
- Old letters by Ruby Proudfoot
- Alex Dukal Stamp Brushes
- Scully's typographic grunge
I realize that you may love or hate my brush experiment, but here are some lessons gleaned from the process:
- Your photo rejects might deserve a second chance with brushes in mind. The photo I chose was not as sharp as I would have wanted, and I would never have used it for a regular print. Sharpness becomes less important, however, if you plan on layering textures over the photo.
- New layer, new layer, new layer...I must have made at least 20 new layers. Why? Because I could have more control over opacity, color, and blending modes for each new element.
- Change the opacity. Did you know that there is bright orange in my image? It just happens to be at about 8% opacity.
- Blending modes. This is a good time to use that little pull-down menu of blending modes (in your layers palette, where it says "normal").
- Erase. Do you remember the heyday of faux-finishing? Brushing (or ragging, or stippling, or whatever) the finish away was just as important as applying it. Try applying a texture with a stamp and removing some of it with another. Magical things happen. When you click on the Eraser tool (E) you can load and select different brushes just as you have done with the brush tool.
Subscribe to:
Posts (Atom)


