Showing posts with label December Monthly Special. Show all posts

Friday, December 18, 2009

Hi-pass skin softening: 4 great tutorials

I've been too busy with a photo shoot today to write my own tutorial, so I'm going to give you an introduction to another skin retouching technique and then point you in the direction of four great tutorials. The technique is usually called "hi-pass skin softening" because it uses the hi-pass filter as a way to soften skin without losing too much detail. Each of the tutorials below is a variation on the hi-pass theme.

As I mentioned in my last post, the problem with the "foundation" method is that it is like adding makeup. It can quickly lead to a dull plastic look that no one wants. So why use it at all? Well, the fact is, if you use it in moderation, it can be a nice way to soften skin in a photo that has an overall soft feel—such as in the bridal photos below:


For most situations, however, a method that uses the hi-pass filter should be your top choice. Keep in mind that there are nearly as many Photoshop recipes for skin softening as there are recipes for chocolate chip cookies. Cookies are on my mind because Michelle made some last night and was not thrilled that they were on the flat and crunchy end of the cookie spectrum. That didn't stop any of us from eating them, because at the end of the day, it's hard to go horribly wrong with butter, sugar, flour, and chocolate.

So what are the staples of a hi-pass recipe?
  • at least one new layer
  • a change in the layer blending mode
  • the hi-pass filter
  • a blur
  • a layer mask to paint in or out the effect
The following tutorials are all good and you should try them all out if you want to find your favorite.

Tutorial 1: hi-pass at the venerable lynda.com site
I have to confess that I am not a fan of video tutorials. I prefer to follow steps at my own pace rather than pause, rewind, pause, etc. But this video is worth a look. It covers more than just the hi-pass method (you'll see our friend, the patch tool, for example), but the heart of the video is this:

1. new layer, filter---other--hi-pass with a radius set very low
2. pull the saturation down to 0%
3. change the blend mode to overlay or soft light
4. use command-i (PC: ctrl-i) to invert the layer (sharpness now becomes blur)
5. add a layer mask and paint out the effects (or add a black layer mask and paint them in)

Like many tutorials, this one uses a hi-end fashion shot rather than your average portrait. To me, that is the equivalent of using a pro photo against a white background to teach someone about to extracting objects from the background (which you also see a lot). It's not real-world Photoshop for the average user.

tutorial 1 is the only one that sticks to the hi-pass filter alone. The other three all use a double layer (low-pass/ hi-pass) approach.

Tutorial 2: "airbrushing" at the Photoshop tutorials site
In this tutorial, you duplicate your background layer twice. One layer will be a layer of blur (people used to use the Gaussian blur, but now Surface blur is the new favorite because it helps keep edge details) and the other layer will be a hi-pass layer. In tutorial 1, the hi-pass layer was inverted to become a gentle blur, but here it will remain in its original sharpened state, where it will work together with the layer of blur to form a compromise of smooth skin and detail.

Tutorial 3: freeonline classes "professional skin smoothing"
Same principles as tutorial 2, but with some variation in blending mode and use of the "smart object" feature.

Tutorial 4: byRo's quick "de-grunge" technique at RetouchPro
This is a favorite among forum members at RetouchPRO—a forum devoted to retouching. My own experience with the forum is mixed in that it's kind of a beast to navigate, but it has many hidden treasures. It reminds me of the chowhound message boards where you can find stellar recommendations from people who know food like nobody's business, but where you also have people who drop in just to ask the same question that has been asked 500 times before.

But back to the de-grunge. Aside from the name, which I find off-putting for some reason, this is a great tutorial. I have used this exact method many many times. The tutorial is clear and relatively simple. The results will be good—and this goes for all hi-pass methods—if you plug in the right numbers (which is the hardest part since there is no one-size-fits-all answer).

Hi-pass methods are worth exploring, but don't even think that we have exhausted the skin retouch possibilities. There's more to come.

Monday, December 14, 2009

Skin Retouch Step 1: The Patch Tool, your new best friend

On the first day of retouch posts yours truly gives you...

the Patch Tool! My favorite weapon in the skin retouch arsenal. This post will give you my completely biased view about why Photoshop's patch tool should be your new best friend for retouching skin.

But first, some clarification on a few points:
  1. A pro retoucher would most likely be horrified by every post I do this month. Why? Well, it's like when I was in grad school and the philosophy professors were horrified that the French lit professors included not just Descartes, but even Plato and Aristotle in their syllabi. First, objected the philosophy profs, those lit professors should stick to literature and second, how can you possibly cover Aristotle in a week? This comparison comes to mind because I was doing grad work in literature while my wife was working in the graduate program of the philosophy department. I heard those complaints all the time, so I decided to take a grad class in philosophy and see what all the fuss was about. For an entire semester, we plodded through Descartes' Meditations. The smartest student in the class liked to stroke his imaginary beard and gaze out the window while exposing the logical flaws of the cogito. By week three, we were still on the first meditation and I knew that this would be the last philosophy course of my life. My point? The real pro retouchers will dodge and burn, burn and dodge until their eyes are ready to bleed. It's really impressive, but it's not my world.
  2. Random digressions are par for course with me. Sorry. Let's get back to business.
  3. This post is just the first step, the elimination of blemishes. I mean, even if you want a very natural and unretouched look, I doubt you want to memorialize a zit.
  4. Out of consideration for my clients, I'm using a stock photo of a girl with typical teenage skin problems. So here she is:
She looks pleasant. Nice smile, but I bet she'd like some help with the skin. Most people would run to the clone stamp tool, but my guess is that most of them haven't given the patch tool a fair shot. I use the clone stamp tool all the time for getting rid of distracting backgrounds, but even in my tutorial on that topic, I make use of the patch tool.

Common problems people have with cloning skin include obvious edges and differences in lighting between source and destination. With the patch tool, it's easy to avoid both of those problems because 1. you lasso your own shapes (rather than stamp a circle, for example) and 2. some algorithmic magic beyond my comprehension helps you clone out a blemish without destroying your lighting.

Let's look at a section of the girl's face:
As a first step in skin retouching, I just want to get rid of the large blemishes. My own philosophy is that temporary things, like zits, get retouched and more permanent "flaws" (like scars, which I think we should embrace) only get retouched if the person asks for it.

Using the patch tool on skin is very easy. Select it (j), draw a line around the area you want to fix—and make it sloppy. Sloppy is fine. Sloppy is good because an irregular line tends to blend well. Here's a super quick selection of a zit (lovely, isn't it?):

Once it's selected (and sorry, but you'll have to imagine this step—no screen grab), click inside your selection and drag to a place that doesn't have the blemish but that has a good texture for the area you want to repair. As you drag, you will see a sort of cloned view inside the your selection, but remember, your end result will not be a direct clone. Look for texture that lines up well. Don't worry about how dark or light it looks. When you let go, your patch selection does its magic:
I didn't mention settings because the default setting of the patch menu should already be "source," which is what you want.

From here on out, it's just a matter of rounding up all those blemishes. Sometimes I lasso a few at a time, sometimes I take an area in smaller parts. It's just trial and error. Make an error and you can just go back a couple steps in the history panel and try again. You can clean up a whole face in a relatively short time.

Here's the "before" section:
and after only a minute of quick and sloppy patchwork:

I haven't eliminated every little problem, just the most obvious. But what you see here is the result of no more than a minute of lasso a problem area/click/drag to good area/release/ repeat.

Try it, you'll never feel like using the clone stamp for skin cleanup again.

Finally, a word of warning: Since the patch tool blends with the surrounding pixels as it heals, you need to avoid getting too close to sudden changes. For example, if I were to make a selection of skin too near her lip, I might end up with a kind of muddy rose blur. Three possible solutions to that sort of problem:
1. pay closer attention to the relationship between the selection and the area you drag to. For example, the zit near the corner of the top lip can be selected and dragged to the side in a way that lines up the same lip/skin transition and your results will look good (just pay attention to how things line up as you drag).
2. if need be, you can use a selection tool (such as the lasso tool) to define an area large enough to include both the problem skin near the lip and the good skin while excluding the lip itself, then use the patch tool within your selection. The blended result won't use any pixels that aren't in your selection, hence, no muddy blur. This is something I might find myself doing around a brunette's hairline to avoid smudgy looking blends.
3. the formerly maligned clone stamp can come to the rescue.

Sunday, December 13, 2009

December Monthly Special: Skin Retouch

Back from Paris with a souvenir from the plane ride home: a stomach flu that has made the rounds through our whole family. Nothing conveys the spirit of giving like a virus. Getting sick is kind of a holiday tradition for us. Other people open advent calendars to find sweet surprises, we start each day with a new symptom. On the first day of Christmas, my daughter gave to me, a fever of one hundred and three. On the...wait, where was I? Oh yes! The December Monthly Special!

I know that the month is half over, so I'm going to get very specific and work on an end-of-the-year goal: tackling the dreaded question of skin retouching. How to retouch skin is the number one question posted in forums devoted to photo retouching. OK. I just made that up, but still...it sounds true, doesn't it? I mean, what else would it be? How to add a fake tattoo? (Clients ask for this all the time, don't they? I don't know, Marc. That portrait of my baby is beautiful, but it seems like something is missing. Perhaps some angel wings, a full sleeve, and her name in Kanji just above the diaper? What do you think? No? Too much? A butterfly on the ankle then?)

When I first began my "starters" section, my intent was to build up steps that could then become a recipe. The first recipe was meant to be the portrait retouch workflow. Most of the elements are already there—color correction, whitening teeth, brightening eyes, and so on—but skin retouching is the dreaded beast that I have saved for last. I had a mega-post in mind: the ultimate skin retouch tutorial that goes over many possible methods and evaluates each one, but a more realistic goal might be to break it down into multiple posts.

Wait! Did I say "realistic" and "goal"? And in the same sentence? That won't do. I prefer challenges. I haven't done more than 10 posts in a month since May, and I just noticed that it's December 13, which just happens to be twelve days until Christmas, so I am going to do Take-Out Photo's version of an advent calendar: 12 posts in 12 days. Not every post will be about skin retouching, but many will. I won't bother with the shared linkies this month, but they will be back in January.

Who knows what surprises you will find? One thing I do promise: no viruses.

Tuesday, December 30, 2008

L'ange des bois...

click to enlarge

L'ange de...what? Titles sound more pretentious in French, don't they?

Time is almost up for the Brushes Monthly Special. Record low participation. Record high readership. I'm stumped.

In any case, I wanted to do one last brushes experiment with the set I made before moving on to a new theme for January. The photo was taken in Paris. How often do you just happen upon an angel walking down the street and into the woods? It was kind of like a scene from Wim Wenders' Wings of Desire (with a bit of Russ Meyer thrown in).

I'm not sure that I like the with-brushes version better than the toned and shaded base photo, but I do love playing with the depth and ambiguity that brushes can add.

Monday, December 22, 2008

Best wishes for Christmas...

My posts have been less frequent due to holiday business and a never-ending antibiotic-resistant sinus infection. Hopefully, I will have time for some more brushes posts before we move on to a new theme for January.

I kept things fairly simple in the photo above by adding two brushes. Eva likes to call herself "blue bug," so this seemed an appropriate way to express her imagination.

If there's any tip here, it's that your brushes project need not be complicated. I hope to see some of your work with brushes on the Monthly Special page before the month's end.

Tuesday, December 16, 2008

Hi-Res Paris Flea Market Brush Set

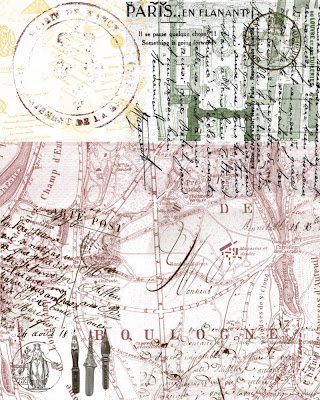
Christmas comes early at Take-Out Photo. For all my readers, I just made a free brush set of old manuscripts, post cards, maps, and official stamps all acquired at Paris flea markets. The above image is a small sample of some of the stamps—I mean, brushes (They really function more like digital stamps). Most of them go up to the maximum resolution of 2500 x 2500 px.

I made them in CS3, so I'm not sure about compatibility, but I did test it in Elements (6) and it worked!

As for the "Terms of Use"—I'm all about "free," so use the brushes for whatever you want. Obviously, I would love to get more people reading my blog, so I welcome any credit that points them my way. But that said, I know what a pain it is to track down info for every brush used. My only restriction is that there be no online redistribution of the brush set without my consent.

Thanks to dropbox (which I use every day and love), I can upload the .abr file of the brush set (I think there are 22 brushes in all) and share it with you through this link (fingers crossed). The file is pretty big. I am including both the uncompressed and the (disappointingly not-that-smaller) zipped version.

Monday, December 15, 2008

A very short post about making your own brushes

I had planned on doing a tutorial on how to make your own brushes in Photoshop, but December is quickly passing and there are already at least two really great tutorials about making your own brushes.

And so...rather than re-invent the wheel, I advise you to check out either this tutorial or this one.

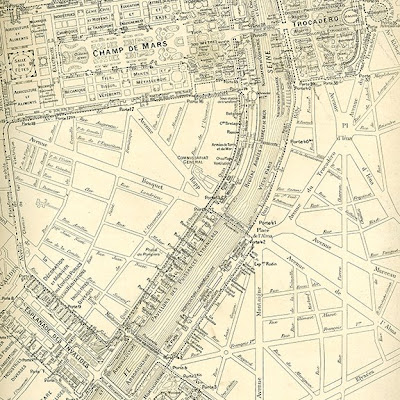
You won't believe how easy it is to make your own brushes. I made a brush of the map above in about 30 seconds. And guess what? I tried to make one in Elements and it worked as well. Just remember to resize the image you want to turn into a brush to no larger than 2500 x 2500 px (or 1000 x 1000 px for early versions of Photoshop) first.

I'm thinking a Paris flea-market set of brushes (maps, buttons, manuscripts, and such) might make a nice Christmas present to all of my readers if I can just figure out how to deliver it to you via my blog. Is that possible? Anybody out there know?

In any case, take a break from the December madness and do the December Monthly Special—it's therapeutic. Really. Not frustrating at all. It's like finger painting without the mess.

Friday, December 12, 2008

Another PS Brush Style, Another Tip


This is a completely different look than yesterday's post. I'm still not sure what I think about it—except that it makes me think of the cheesy Tiffany rendition of "I think we're alone now." Probably a bad sign.

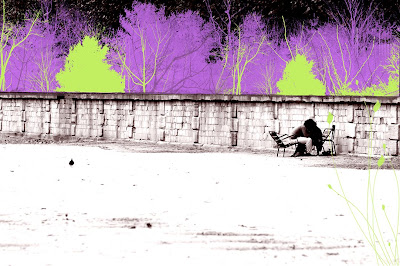
In any case, I wanted to try something that had less dimensionality and that was blatantly artificial. The whole thing was done with Fresh Foliage brushes. The bright brushed-on trees shield our young lovers from the passers-by above (hence, the song reference).

My tip—or observation:
There is something about brushes that seems to call out for monochromatic or toned photos. I did a hi-contrast grape tone on this photo because I didn't want too much realism with the brushes. In my last post, I didn't do any toning, but the photo was already very monochromatic. And my first brush experiment was also toned. But this is no rule (there are none), just an observation.

What do you think? Too strange? Just your style?
Post some of your own experiments and link back to the Monthly Special.

Thursday, December 11, 2008

Tips from Experimenting with PS Brushes

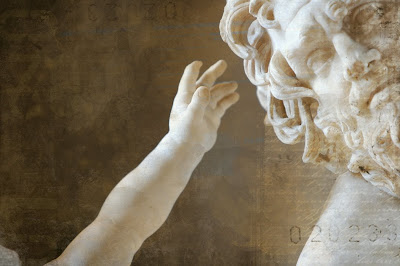
Here is a brush experiment with a photo I took in the Louvre. Some of the brushes I used are:
and no doubt others that I am forgetting to mention.

I realize that you may love or hate my brush experiment, but here are some lessons gleaned from the process:
  • Your photo rejects might deserve a second chance with brushes in mind. The photo I chose was not as sharp as I would have wanted, and I would never have used it for a regular print. Sharpness becomes less important, however, if you plan on layering textures over the photo.
  • New layer, new layer, new layer...I must have made at least 20 new layers. Why? Because I could have more control over opacity, color, and blending modes for each new element.
  • Change the opacity. Did you know that there is bright orange in my image? It just happens to be at about 8% opacity.
  • Blending modes. This is a good time to use that little pull-down menu of blending modes (in your layers palette, where it says "normal").
  • Erase. Do you remember the heyday of faux-finishing? Brushing (or ragging, or stippling, or whatever) the finish away was just as important as applying it. Try applying a texture with a stamp and removing some of it with another. Magical things happen. When you click on the Eraser tool (E) you can load and select different brushes just as you have done with the brush tool.
I had a lot of fun modifying the photo. The brushes create a pleasing depth. Perhaps, you say...but what does it mean?

Sunday, December 7, 2008

Free Photoshop Brushes Resources

I've been lagging behind on my posts (sickness, end of semester and holiday rush, etc.), but I hope to correct that very soon.

In the meantime, here are a few good sources of photoshop brushes to keep you working on the Monthly Special:

Smashing Magazine as a list of 50 must-have photoshop brushes

Photoshoproadmap lists 100 brushes (you will begin to see some crossover between lists).

Qbrushes lets you browse a decent selection by category.

Tutorial blog has a list with some good ones.

The talented Eduardo Recife shares some great brushes (under "goodies") and fonts. No previews, so you will just have to trust me that they are worth the download. And while you're there, check out his art. I love the handmade (i.e. no Photoshop) collages (see Illustrations--> Collage Book 1, for example).

and finally, there's the massive collection at deviantart.com.

Friday, December 5, 2008

Finding, Installing, Loading, and Using Brushes in Photoshop and Elements

Finding Brushes
Finding free brushes for Photoshop is easy. In fact, the number and variety of free brushes can be overwhelming. Google "free photoshop brushes" and you will see what I mean. I will do a future post with links to some of my favorites, but for starters, check out this list of 75 hi-res brushes picked by Elite by Design (I will be writing four posts for them in January, by the way). Once you have found some brushes that you want to download, pay attention to the following:
  • Compatibility. Not all brushes work in Elements or in every version of Photoshop, and many brush sets won't specify compatibility. If you like it, go ahead and try it. Either it will work or it won't, but it shouldn't crash your system or anything (Should I be putting a legal disclaimer here? hmm.), so give it a try.
  • Brush size. If you want to use brushes to create a new banner for your blog, pretty much any size will do. Larger images, however, may demand larger brushes. Look at the maximum pixel size of a brush to see if it's hi-, medium-, or low-res. 2500 px, for example, is hi-res.
  • Price. With so many free brushes out there, I would think twice before buying a brush set . If you see a must-have set that is not free, check places like deviantart to see if something similar is available for free. Another thing to consider: you can make your own brushes. I will teach you how this month.
Installing Brushes
The process is the same for Photoshop and Elements. Once you download (and unzip as needed) a brush set (should be a .abr file)...
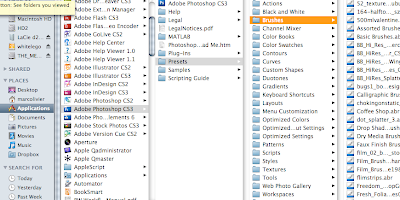
Go to Applications-->Photoshop (or Elements)-->Presets-->Brushes and drop it in. That's it.


If you had Photoshop open at the time, you will have to quit and re-open before you can access your new brushes.

Loading Brushes
Select the brush tool (b), and look at the brush menu bar on top. In Elements, you will see (on the left side) a swoosh-like image of one of the basic brushes:
In Photoshop, you will see (second from left) a dot representing the active brush:
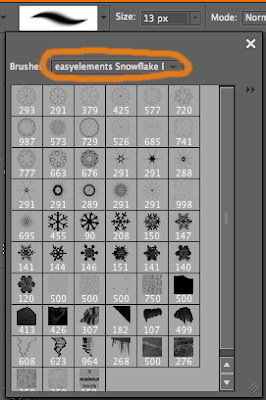
Click on the arrow to the right of your brush image (swoosh or dot) to get a menu with Thumbnails of your brushes. From there, click on the small arrow(s) for a menu that lets you change the size of the thumbnails (I like to make them larger so I can see the custom brushes more clearly). You will also see a "load brushes" command, but you will not use it because you have already put the brushes in their proper place. Instead, in Elements (I'm using Elements 6 for Mac), you will locate the pull-down menu just above the thumbnails...
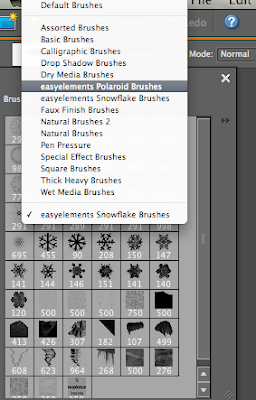
where you will find a list of your brushes (including any that you dropped into the brushes folder before opening the application). Select a set you want to use, and you're ready .
In Photoshop, the brushes will all be listed in the menu that pops up when you click the small arrow. (In CS3, you can hit F5 and bring up a brushes palette on the right that will do the same things).
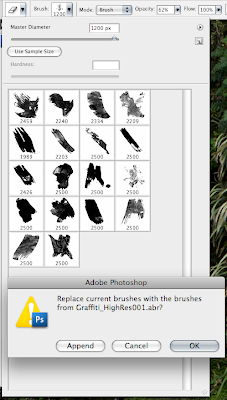
When you select one of the sets, a dialog box will ask if you want to replace the current brush set with the new ones. You do. No worries, your other sets will still be there in that same menu when you want to switch.

Using Brushes
This tutorial will only cover the basics, and in a future tutorial I will talk about some of the options.
  • Changing brush size: You can either use the slider in the brush palette, or (and I highly recommend this shortcut) use the left ([)and right (])bracket keys to change brush size. Also, for brushes that have hardness/softness settings (such as basic brushes), hold shift while pressing the left or right bracket keys.
  • Opacity: There is an opacity slider in the top brush menu, or you can make a new layer for your brushes and change the layer opacity—although the latter option will uniformly change the opacity while the former allows you more control.
  • Color: You can change the color of the brush by clicking the foreground color box and selecting a new color.
This should get you started on the December Monthly Special.

Monday, December 1, 2008

December Monthly Special: Photoshop Brushes

We are jumping into the ever-growing world of Photoshop brushes for the month of December. I can honestly say that until today I have never used brushes for anything other than masking. But brushes are hugely popular and easy to use, so why not give them a try?

I won't go into any full-fledged tutorial in this post, but I promise that several will be forthcoming in the next few days.

If you are new to brushes, let me tell you from my own experience as a brush novice that it was a lot of fun. In the case of the ever-popular grunge aesthetic, we get to abandon the less-is-more mantra and just go crazy. During the month, I will teach you the basics of installing and using brushes, creating your own brushes, finding the best brushes for your project, and achieving different looks with brushes.

Here is my first experiment with brushes...


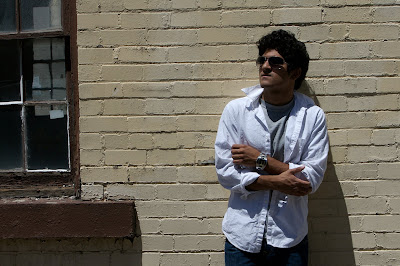
Before the attack of the grunge brushes:
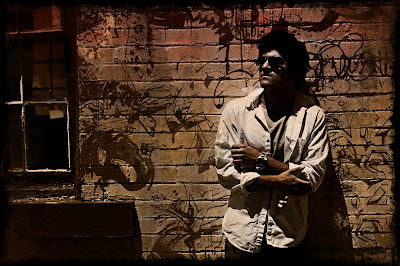
After grunge gone wild:

The brushes I used include:
dripping brushes
grunge brushes
grunge corners
grunge border brushes
grungy watercolor
more grunge brushes
and perhaps most importantly, a graffiti brush set (for which I can't find the reference—so if you know, please comment and I can give them credit).

The best thing about using brushes is that the results are fast and that you can't really get it wrong. I am hoping for a lot of creative experimentation this month, so be sure to post and link back here with your brush projects (see the FAQ is you have questions about how to do this).

Sunday, November 30, 2008

December Monthly Special Hint

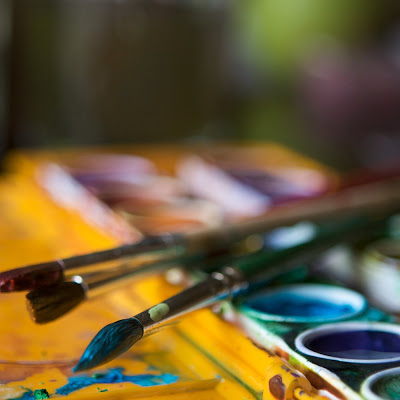
The November "still life" theme is ending, but there is still time to post on the (rather lonely) Monthly Special page. For December we are back to Photoshop with a theme that will be a real challenge for me, but that should also be a lot of fun. In keeping with tradition, my still life above also serves as a hint for next month's theme (which I'm guessing will be a popular one). Do you think you know what it is?