Finding BrushesFinding free brushes for Photoshop is easy. In fact, the number and variety of free brushes can be overwhelming. Google "free photoshop brushes" and you will see what I mean. I will do a future post with links to some of my favorites, but for starters, check out this list of
75 hi-res brushes picked by Elite by Design (I will be writing four posts for them in January, by the way). Once you have found some brushes that you want to download, pay attention to the following:
- Compatibility. Not all brushes work in Elements or in every version of Photoshop, and many brush sets won't specify compatibility. If you like it, go ahead and try it. Either it will work or it won't, but it shouldn't crash your system or anything (Should I be putting a legal disclaimer here? hmm.), so give it a try.
- Brush size. If you want to use brushes to create a new banner for your blog, pretty much any size will do. Larger images, however, may demand larger brushes. Look at the maximum pixel size of a brush to see if it's hi-, medium-, or low-res. 2500 px, for example, is hi-res.
- Price. With so many free brushes out there, I would think twice before buying a brush set . If you see a must-have set that is not free, check places like deviantart to see if something similar is available for free. Another thing to consider: you can make your own brushes. I will teach you how this month.
Installing BrushesThe process is the same for Photoshop and Elements. Once you download (and unzip as needed) a brush set (should be a .abr file)...
Go to Applications-->Photoshop (or Elements)-->Presets-->Brushes and drop it in. That's it.
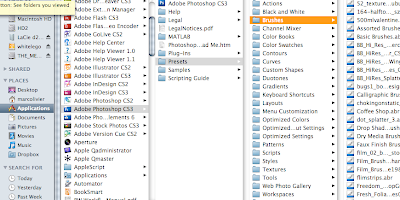
If you had Photoshop open at the time, you will have to quit and re-open before you can access your new brushes.
Loading BrushesSelect the brush tool (b), and look at the brush menu bar on top. In Elements, you will see (on the left side) a swoosh-like image of one of the basic brushes:

In Photoshop, you will see (second from left) a dot representing the active brush:

Click on the arrow to the right of your brush image (swoosh or dot) to get a menu with Thumbnails of your brushes. From there, click on the small arrow(s) for a menu that lets you change the size of the thumbnails (I like to make them larger so I can see the custom brushes more clearly). You will also see a "load brushes" command, but you will not use it because you have already put the brushes in their proper place. Instead, in
Elements (I'm using Elements 6 for Mac), you will locate the pull-down menu just above the thumbnails...
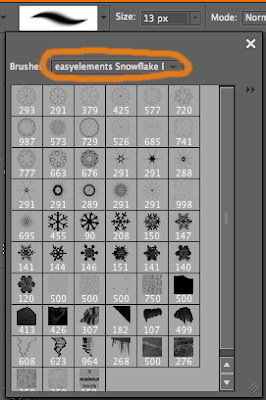
where you will find a list of your brushes (including any that you dropped into the brushes folder before opening the application). Select a set you want to use, and you're ready .
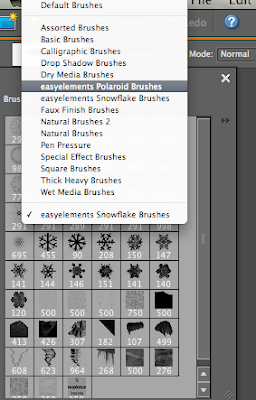
In
Photoshop, the brushes will all be listed in the menu that pops up when you click the small arrow. (In CS3, you can hit F5 and bring up a brushes palette on the right that will do the same things).

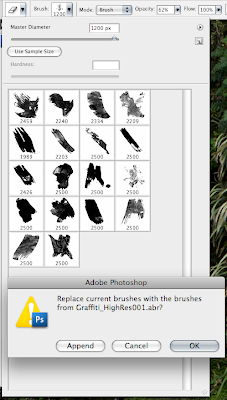
When you select one of the sets, a dialog box will ask if you want to replace the current brush set with the new ones. You do. No worries, your other sets will still be there in that same menu when you want to switch.
 Using Brushes
This tutorial will only cover the basics, and in a future tutorial I will talk about some of the options.
- Changing brush size: You can either use the slider in the brush palette, or (and I highly recommend this shortcut) use the left ([)and right (])bracket keys to change brush size. Also, for brushes that have hardness/softness settings (such as basic brushes), hold shift while pressing the left or right bracket keys.
- Opacity: There is an opacity slider in the top brush menu, or you can make a new layer for your brushes and change the layer opacity—although the latter option will uniformly change the opacity while the former allows you more control.
- Color: You can change the color of the brush by clicking the foreground color box and selecting a new color.
This should get you started on the
December Monthly Special.

 Here is a brush experiment with a photo I took in the Louvre. Some of the brushes I used are: