1. rich sunset, but completely dark river
2. lighter river, but way too bright sky
3. a "just OK" compromise that doesn't really capture what you saw
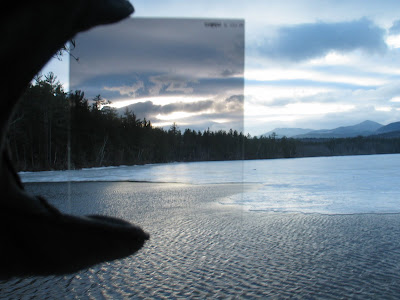
If you want to be old school about it, you would compensate up front by attaching a graduated neutral density filter to your camera. A GND filter adds a neutral gradient that basically slows down the exposure (by letting less light in) on part of your shot—typically the sky:
 But if you don't have a filter handy when you take the shot (and most of us don't), there is still hope. To do a post-processing version of a neutral density filter, you will need to understand the basics of masking (which I covered in a monthly special way back when). You may also want to review the very easy principles of masking in/out layer adjustments that I showed you in "Layer adjustments for the lazy artsy slob." I will only explain in shorthand here, because those other posts will help you with the basics.
In a nutshell, to mimic a GND filter you simply want to do a simple curves adjustment (just like showed you in "Layer adjustments for the lazy artsy slob") and instead of painting the effect in or out with a brush, you will use a gradient. (note: Do not confuse this with HDR although it has some similarities.)
So you start with a curves layer, and to darken things up, you pull the curve down and to the right:
One important pointer: I suggest using your backslash key (\) to toggle a red mask on an off as you experiment with the clicking and dragging part. Don't despair if your gradient is going the wrong way at first or if it doesn't cover the exact part of the image that you want. I almost never get it right the first time. That's what "undo" is for. In fact, do it wrong on purpose and look at the red mask to see what's happening (don't forget to toggle to your regular view). Here's what mine looks like:
Voilà! Fake GND.


1 comments:
Great post, looks nice - I will definitely try this
Post a Comment