Showing posts with label curves. Show all posts

Friday, July 22, 2011

Create that sun bleached look in Photoshop using nothing but curves

Before and after a quick sun bleaching with curves

First, a disclaimer: I actually like the "before" pic at least as much as the "after." But since the whole sun bleached style is so popular, I thought I'd show you how easy it is to do with nothing but curves in Photoshop. In a future tutorial, I'll show you how you can experiment with your own photo effects and make them into actions instead of paying for them.

step 1: It should go without saying, but I think it makes more sense to choose a photo that is actually outside and in the sun, preferably with some nice backlighting or some sun streaks or flares (I'm not a fan of adding fake flares, so I won't do it here).

step 2: open your photo and duplicate the layer. It's not absolutely necessary, but I like to use the duplicate layer for the "after" and keep the background for the "before" just so I can toggle the two on and off and maybe mess with the opacity of the "after" layer before I commit to flattening the final image.

step 3: add a curves adjustment layer
I'm going to end up doing 3 separate curves adjustment layers (the better to show my thought process. you can do it in fewer or more once you know what you want). On this first curves layer I am going to click to create a control point in the middle of the grid and pull it up and to the left in order to lighten the photo pretty dramatically:
It's lighter. It's pretty. But it's not really "sun bleached" yet.

step  4: add another curves adjustment layer, bleach and warm. You will probably have to make your photo layer (not the curves 1 layer) active before adding the curves layer 2, and then you will want to drag the curves layer 2 above curves layer 1. On this new curves layer, the adjustments are going to tweak the color by making it warmer and less contrasty. Instead of just moving the main (rgb) curve, you are going to do adjustments separately (note: this is still all done on your curves 2 layer. no need to create more and more curves layers) for "red" "green" and "blue" channels.  It's going to be like my "adjust tone and color" tutorial, but more extreme. Using the pull down menu (right above the curves grid where it says "rgb", select the blue layer. If you put a control point in the middle ("ish"--just experiment) and pull towards the lower right corner, you will make the color more yellow. 
You can see that I only yellowed it a little. I also took the control point in the lower left corner and dragged it straight up. You can get a really fantastic in-depth explanation of curves here, but to be brief, I'll just say that you are basically lowering the contrast as you pull that bottom corner control point up. Don't feel like you have to have one channel perfect before you move to the next. In fact, the best thing to do is to mess with each channel and go back and forth between the three channels experimenting with changes until you're happy. It's just like adding salt and pepper to soup, except you can actually take the salt back out if you use too much. Here's what I did to the red channel:
I pulled that lower left control point up higher than I did on the blue channel and that's it.
Then I did the green channel a bit:

C'est pas sorcier! as we say in French. "It's not witchcraft" (do we say that in English?) Just eyeball your photo to decide how much you want to change each channel. 

Guess what? You could stop right here and you've got a nice warm photo that's a big change from the "before." It's warm, light, and dreamy.
But why leave well enough alone? I decided that I would like to make the background even lighter, but I don't want to wash her out completely. So...

Step 5 I added a third curves layer (be sure to put it on top), lightened it the same way I did with my first curves layer, and then brushed out the adjustment selectively on the bride.

Once you have lightened it, just select your brush tool (b)
, look in the menu bar to adjust the softness and size (which you can also do with the [ and ] keys—clicking the right bracket makes it bigger, the left makes it smaller. doing the same thing with "shift" makes it harder or softer). I like to bring the softness down to "0" because I want really gradual, diffused effects here. 

Then I adjust the "opacity" setting (up in the top brush menu bar) WAY down (like 10% or so) so I can gradually paint the effect out. NOTE: make sure that black is selected as your foreground color.

If it's some funky color just hit "d" to make them black and white and use "x" to switch which color is in front. Now just paint the effect out to varying degrees as needed. I decided that I didn't want to over-lighten the hair, the lips, or too much of the face. (It's the same basic principle at work in my tutorial, "layer adjustment masks for the lazy, artsy slob").

step 6: Mess with opacity to fine tune your effect. Too much change on a given layer? Just dial down the opacity. When you like what you see, click the eyeball icon to turn off your background layer (this is assuming you copied your background layer way back in step 1) then select "merge visible" from the layer menu (the little triangle at the top of the layers palette brings up the menu). Now you have the "after" layer merged on top and the "before" on the bottom. If you love the "after" then flatten the things and be happy. If you don't, well, ask a friend if you're just being too picky.

bonus stuff:
Want to change things even more? Create a blank new layer, fill it with some sunny color using the paint bucket (double click the foreground box mentioned earlier to bring up the color picker and then just choose some peachy sunny color),  and then experiment with blending modes. Choose "soft light" or "overlay" from the pull down menu in the layers palette instead of "normal" and then lower the opacity of your overlay color until you have the king of tinted, washed out look you like.
 I did it, and then went "meh. don't need it."

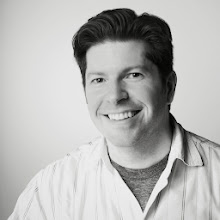
Here's the lovely final image once again:
VoilĂ ! Easy, right?

Wednesday, September 29, 2010

Real-life retouch: a Paris bridge

As promised in my last mess of a post, I want to start doing real-life retouch examples of things I am actually working on. Right now, I'm still sorting through the 3000+ photos I took in Paris in July. The one above was taken on the beautiful Pont Alexandre III. I think it has potential, but I don't like how it's reading. As I take you through the steps that lead me to something I like, you will notice that:
  1. I believe in using a very intuitive approach
  2. curves adjustment layers + masks are my best friends
First, I identify what I don't like about the photo: the statue is too dark and I would like it better if the highlights stood out a little more.

My solution:
1. I add a curves adjustment layer.
you can add a curves adjustment layer from the fill/adjustment layer pull-down menu at the bottom of the layers palette or, if you have CS4 or later...
you can click on the s-shaped curve on the top row of all those boxes above your layer's palette. The curves adjustment layer shows you a histogram (the mountainous graph that maps your image information from dark[left] to light [right]). You can see that I have a lot of information on the dark side of things. To fix that, I click on the diagonal line (I happen to click close to the lower left corner—i.e. down in the darkest area, although it doesn't matter a lot in this case), which gives me a control point (a little dot I can use to drag the curve around). I don't use a formula, I just experiment and see what looks good. Here's the curve I end up with:

Had I pulled it in the opposite direction, I would have made the image darker.

2. "paint with light"
The sky is fine, it's the statue part that needs to be lightened. To undo the effect on the sky, I simply brush it out. First, I hit "b" to get the brush tool. Then I adjust my settings:
Once I select the brush tool (b), the top toolbar gives me options (click on the dot to the right of "brush" to see them) to change the size of the brush, the hardness, and so on. I start with a huge size (1600 px) because I'm making broad sweeping changes. However, I often change size on the fly by using the right (bigger) and left (smaller) brackets on my keyboard. I put the hardness all the way down to zero because I want completely soft, gradual transitions (fyi—you can also adjust hardness as you go by using shift with the left and right bracket keys). One more setting that I adjust as needed: flow. It's like controlling how fast ink is coming out of the brush. I want to paint in changes gradually so I can see if I like where it's headed, so I start with 17%—a fairly random choice.

One thing to keep your eye are those white and black boxes (if yours are not white and black, hit "d" to bring them back to default). Whichever color is on top is the color you are painting.
I want to paint with black because I am blacking out the effect on the sky. Toggle between white and black by hitting "x." As I said earlier, I like intuitive retouching. I simply paint until I like what I see. You can hit the backslash key to make your painting visible in red like this:
The red shows where I have been painting out the lightening effect on the curves adjustment layer. Here's what the black looks like in the curves adjustment layer mask over in the layers palette:
3. Are we done yet? No, one more curve.
For a moment, I think I'm done, so I go to the pull-down menu (the little triangle at the top right of the layers palette) and choose "flatten image":
Goodbye separate curves layer. Now I can save and quit...or can I? No, I'm still not quite happy. I would really like to see the highlights on the statue pop a bit more, so it's back to curves again. Instead of lightening everything and painting out everything but the highlights, I pull the curve down to darken everything...
And then I paint the highlights back to their lighter state:
It may seem like I just undid most of the lightening from my earlier curves adjustment—and maybe I did—but this is a try-as-you-go process and as long as it's moving me toward something I like then I'm happy.

4. Meh. The color isn't doing anything for me.
This isn't exactly the most spectacular sunset in the world, and although I like the gold, I don't like it enough to convince me that this wouldn't be better in black and white. Another motive: black and white sells better than color in home decor, and I've got bills to pay.

And here is where the "real-life" retouch gets hypothetical for a moment. The truth is, I like to do black and white conversion in Silver Efex Pro, but if I were to use Photoshop, I might pull up the black and white conversion from the Image Adjustments menu and start to play with the sliders:
Confusing? Yes, so I like to work on each slider, pull it to the extreme to see what part of the photo it affects, and then make a more subtle adjustment. Look at the "yellows" slider, for example. If I pull it all the way to the left to -200%, the gold virtually disappears:
If I pull it all the to the right (300%), the gold becomes shiny beyond belief:
Trial and error has shown me a way to make the gold stand out. So at this point, I would set it to something more reasonable (140%). There is also a "tint" checkbox that I decide to try for fun. I end up setting the hue to 35 and the saturation to 1% just to give a slight warmth to the photo. Where did I get those numbers? I just dialed the saturation up high, moved the tint around to find a good color, and then dialed the saturation all the way down. In Photoshop, I now end up with this:
It's a fairly nice black and white. But as I mentioned earlier, I usually do black and white in Silver Efex Pro, so in reality, I take the color version of the photo, and redo the black and white in that program instead. What I'm really in the mood for is high contrast and some grain, so instead of the more subtle black and white above, I end up with this:
It's all a matter of preference. I'm kind of waffling between the two versions. The latter version is perhaps too contrasty online, but print always tones things down a little. Either way, I like the end product way more than the beginning.

And there you have it. My first walk-through of a real life retouch.
Helpful? Not so much? Want more or not?

Thursday, March 18, 2010

Layer adjustment masks for the lazy artsy slob

When it comes to masking, those extra neat and precise detail-oriented types have the clear advantage. But if you're more the sloppy, intuitive, artsy type, and/or you're a beginner then rejoice! This tutorial is for you. Oh, the discipline that masking requires! This is probably one of the reasons that my personal projects involve fairly minor post-processing manipulation. Mastering all of the selection tools (I have a particular fear of the reputedly wondrous pen tool.), loading alpha channels, altering blending modes...it's just so much to learn that I won't even pretend to cover it all by the end of the month. We'll get to some of it (alpha channels is coming soon), but for today, I want to bask in the relative ease of basic adjustment masking. In particular, the kind of masking that doesn't require precise borders. Here it is in three steps:
  1. you open your image
  2. you add an adjustment layer such as curves, hue/saturation, etc.
  3. you use a very soft brush and paint effects in or out in your sloppy, intuitive way.
Maybe you already know the joys of this kind of masking, but then again, maybe you were just avoiding masks altogether and weren't aware that you had such an easy option.

So let me give a basic example.
Some people might call this the "painting with light" technique. I'm not a fan of the term, because it makes me think of Thomas Kinkade "painter of light." No offense if you're a fan of his (obviously a lot of people are or he wouldn't have stores in your local mall), but those cottages of his always have such intense light emanating from the windows that I can't help but think I am witnessing either an alien abduction or a terrible fire.

But back to "painting with light."
Let's take this pretty lame photo of the pont Alexandre III:


It's no prize to begin with, but if it was the only one you had and you wanted to make your friends green with envy over your trip to Paris then some retouching could help further your sadistic aims.

Now I'll add a curves layer:
Click on the curves icon at the bottom of your layers palette, or in CS4 you can click on the little "s-curve" icon.

Now let's lighten the whole image by taking that black dot and pulling it toward the upper left corner of the curves box:You will see the effect over the entire image because you haven't done any masking yet. With the curves adjustment layer, you automatically get a white mask, which means that any adjustments you make will be applied to the whole image. If you use a black paintbrush on the mask, you can selectively remove the effect. It's just a matter of preference, but I think it's way more fun to use a black mask and the selectively paint in the effect. The only advantage is psychological—brushing the effect in feels more magical whereas brushing the effect out just feels like cleaning up a mess (at least that's how I see it). So dump that white layer mask (click and drag on the mask part—NOT the curves side or you'll trash the whole layer) in the trash:

Yes. Delete. Now alt click on the mask icon to get a black layer mask.

You will just see the dark original...
but by taking a brush (b) and painting white in the mask you can add the light back in as you please. Use the right and left brackets to change the size of your brush and use them with shift to change the softness. For this kind of sloppy intuitive work, I set the brush hardness to zero to avoid strong edges to my changes. You can also adjust the opacity of your brush strokes up in the brush toolbar.

Here's some sloppy painting in action:

Hit the backslash key (\) to see your masking as a red overlay:

You can toggle back and forth or just paint in the overlay view, whatever works. Some more quick painting—and really, this is quick and sloppy but it works—and you've lightened up the bottom:

Remember that this isn't about making one uniform mask, you can change the opacity and make more subtle little blobs of change....

Keep following this process (adding adjustment layers and masking their effects) on as many layers as you want. For example, I think the sky could be less washed out, so I'll add another curves layer and pull the curve down toward the bottom right corner to make everything darker:

It looks like you just undid all of your previous work, but in a minute you'll be painting the effect in and out as above. Once again, I prefer to trash the white layer...


and change to a black layers mask as before.


Mask away....
Notice that I'm not trying to be super precise selections. Instead, I'll use a low opacity brush to feather the effect a little for smooth transitions. I will also take some of the effect off of the clouds to keep them fluffy white.

You can now see the two curves layers...
but since this is a picture of France, two just feels too....too...how you say...conventional. Three is much more interesting.
A little more contrast selectively applied spices things up. And if you think you've gone too far with any one layer, you can always reduce the opacity.

By this point, I'm done, but you could add as many layers and adjustments as you want.
Finally, then, with no adjustments other than our three curves layers, you go from the "meh" photo...
to the "aahhhh" photo:

Closing words...
  • use this technique on anything from landscapes to people's faces
  • you don't need surgical precision to make artful changes
  • if you have never tried adjustment layers and masks, this "sloppy" intuitive way is the least intimidating way to start.